Extending a Memento Wallet
Extending a Memento Wallet
Custom Navigation
Limitations
Memento's React-Native SDK has a couple of limitations in terms of Navigation:
- Onboarding navigation is currently locked to being a single flow of screens, with standard push transition between each screen.
- Many of the "whitelabel" screens provided by Memento SDK expect a back action and are designed with a standard push transition navigation in mind.
Custom Navigation for When Logged
Despite the limitations, the screens for when users are logged in, are quite customizable. This is primarily because we are able to swap out the default <Cards /> route with a custom route of our own.
const MyCustomCardsRoute = (props: { name: string }) => {
  <Stack.Screen name={RouteNames.CARDS}>
};
Now from wherever your routes for <MementoContainer> replace the <Cards /> with a component :
<MementoContainer {...mementoContainerProps}>
   {/*...other Routes*/}
   <MyCustomCardsRoute name={RouteNames.CARDS} />
</MementoContainer>
Example - Using BottomTabNavigator
BottomTabNavigatorFollowing the instructions above on how to replace the <Cards /> screen, we can now replace it with a BottomTabNavigator.
We're be using React-Native's BottomTabNavigator for the purpose of this tutorial, but you should be able to use whatever
const HomeTab = () => {
   return (
      <Cards
         name={RouteNames.CARDS}
         header={<></>} // remove header
      />
   );
};

const CustomHome = (_: { name: string }) => {
   return (
      <Tab.Navigator initialRouteName="Home" screenOptions={{ headerShown: false }}>
         <Tab.Screen
            name="Home"
            options={{
               title: 'Home',
               tabBarIcon: () => <Text>🏡</Text>,
            }}
            component={HomeTab}
         />
         <Tab.Screen
            name="Account"
            options={{
               title: 'Account',
               tabBarIcon: () => <Text>🦸</Text>,
            }}
            component={AccountTab}
         />
      </Tab.Navigator>
   );
};
Now we should be able to use this in our app render function (the one with <MementoContainer>):
<MementoContainer {...mementoContainerProps}>
    {/*...other Routes*/}
    <CustomHome name={RouteNames.CARDS} />
</MementoContainer>
Adding Custom Views
Adding custom elements to the Card screen
The <Cards /> component supports adding custom components before/after and in-between the Cards screen's components, as well as custom header and footer for the screen.
By default the <Cards /> will return our recommended setup, which includes:
- A screen header with a way of navigating to the Settings screen, as well as a title of your card/funding-source
- component
- component
- No footer
You can customize this and use your own components here by switching to define this via Cards' child components.
<Cards
  header={<MyCustomHeader /> /*<></> for no header*/}
  footer={<MyCustomFooter />}
>
  <Cards.Summary />
  {/*To remove this element simply remove this from the children list */}
  <View style={{ alignItems: 'center', height: 44 }}>
    <Text>My custom component</Text>
  </View>
  <Cards.TransactionList />
</Cards>
Replacing the Card screen modals
If you look at the Card screen as it's generated via the Memento CLI, you'll notice that it has a lot of useful modals, such as:
- Card pin modal
- Card details modal
- Freeze/unfreeze card modal
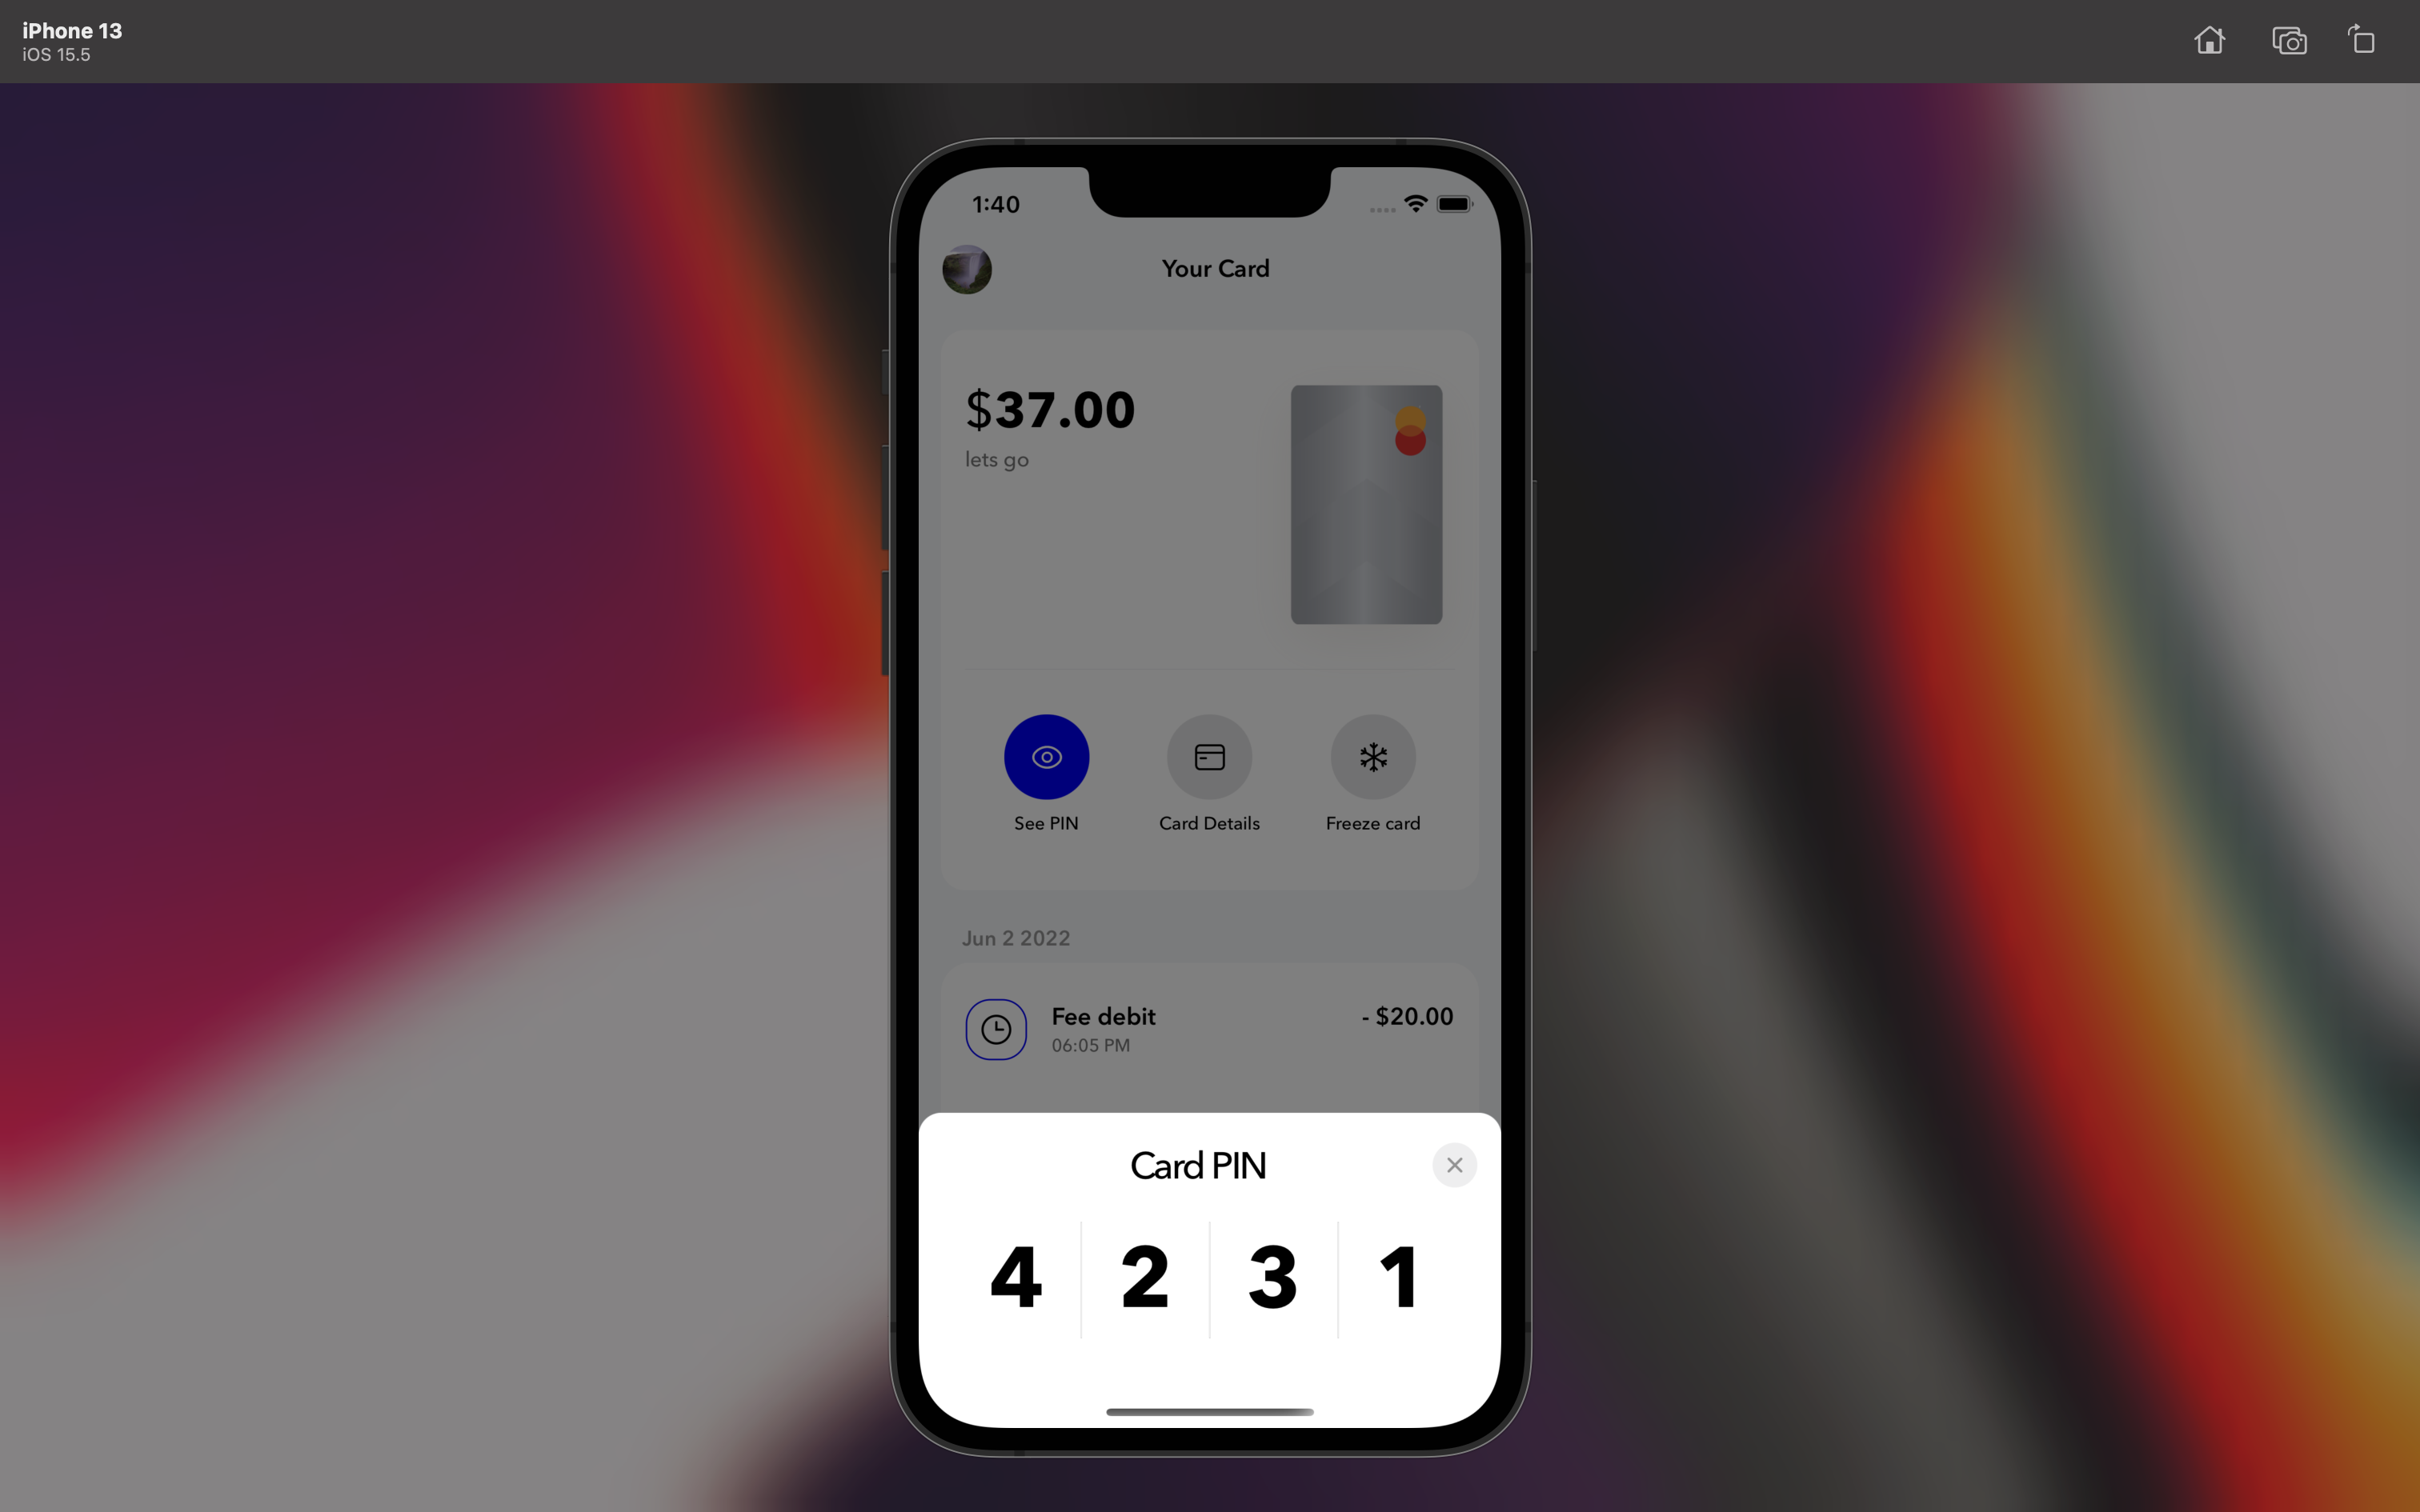
Example: The Card Pin modal
Showing the modals in your custom components
You can get this functionality quite easily by simply using the useModals hook.
NOTE: This can only be used in components that are descendants of MementoContainer in App.tsx
const {
  isPinModalActive,
  togglePinModal,
  hidePinModal,

  isCardDetailsModalActive,
  toggleCardDetailsModal,
  hideCardDetailsModal,

  isFreezeModalActive,
  toggleFreezeModal,
  hideFreezeModal,

  closeAllModals,
} = useModals();

// ...
togglePinModal();

// ...
toggleCardDetailsModal(cardData.cards[0].name);

// ...
toggleFreezeModal(cardData.cards[0].name);
Updated about 2 years ago